Friday, April 29, 2011

Inspiration

It's been a crazy week. Between traveling last weekend to visit family for the Easter holiday, the terrible weather earlier this week, and a sinus infection that has zapped my energy, I've spent zero time in the kitchen. As a case in point - Wednesday night we had cereal for dinner.

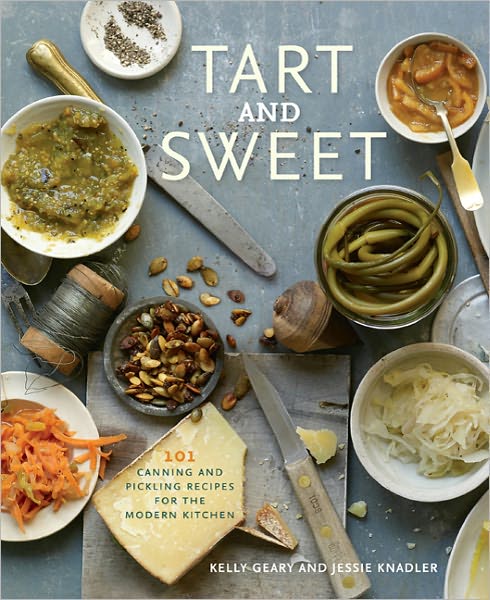
I did manage to do a little online shopping for some cooking inspiration, and I can't wait to get my hands on Kelly Geary and Jessie Knadler's Tart and Sweet: 101 Canning and Picking Recipes for the Modern Kitchen.

I experimented with water-bath canning at the end of last summer and it was a lot of fun (especially since it involved spending time with friends). It's also incredibly satisfying to open a jar of homemade salsa or jam in the middle of January and have a tangible reminder of summer's bounty.

Here's to a quiet weekend with cookbooks, sunshine, and lots of tea.

Monday, April 18, 2011

Pasta with Tomato Vodka Cream Sauce


You know what's better than tomato sauce? Tomato sauce with vodka. Because of their high concentration of alcohol-soluble flavors, tomatoes love vodka like peanut butter loves jelly. Throw in a little heavy cream, Parmesan cheese, and basil, and you might decide to skip the pasta altogether.

Pasta with Tomato Vodka Cream Sauce
serves 4
1 pound dried pasta
2 T olive oil
1 large onion, diced
2 cloves of garlic, minced
3 cups prepared tomato sauce (canned or jarred is fine; extra points for homemade)
¼ cup vodka
½ cup heavy cream
¼ cup grated Parmesan cheese
salt and pepper
handful of fresh basil, chiffonade*
Heat the oil in a 10-12 inch skillet over medium heat until shimmering. Add the onion along with a pinch of salt and cook until translucent, about 5 minutes. Add the garlic and cook for another minute.

Reduce the heat to low and add the tomato sauce and vodka.  Continue cooking the sauce for 15-20 minutes over low heat, stirring occasionally, until it darkens in color and is slightly reduced.

While the sauce is reducing, cook the pasta in salted water, drain, and reserve a cup or so of the pasta water.

Turn off the heat and stir in the Parmesan cheese and heavy cream. Taste the sauce for seasoning and add salt and pepper if necessary. If the sauce is too thick, stir in a little bit of the pasta water to thin it out.  Combine the pasta with the sauce (I do this by adding the pasta directly to the pan; no need to dirty another bowl). Plate and top with fresh basil.

*chiffonade = mad culinary skillz. Actually, it's French for "made of rags", but it does make for a pretty presentation and it’s easy. After you’ve washed your basil, separate the individual leaves from the stem and stack them on top of each other with the largest leaves on the bottom. Starting at the long edge, roll the leaves up. You’ll end up with a little basil snake. Now you chop - place your roll of basil seam side down on a cutting board. Starting at one end, slice through the roll in ¼ inch increments. Congratulations, you've just made beautiful little ribbons of basil!

P.S. This technique also works well for sage, spinach, and mint.

Saturday, April 2, 2011

Egg and Chorizo Burritos


I've been feelin' the love for burritos lately. Besides the fact that I can fill them full of things I love they're also excellent refrigerator velcro - perfect for using up those little bits of things that accumulate in my fridge throughout the week. For lunch today I made just such a burrito stuffed with eggs, chorizo, and veggies. Here's a breakdown of the burrito-y goodness:

Egg and Chorizo Burritos
serves 2

4 oz. fresh chorizo sausage
1/2 red onion, diced
1/2 jalapeño, seeded and minced
1/2 red bell pepper, seeded and diced
1 small russet potato, diced
1/2 tsp ground cumin
Pinch of salt/pepper
3 eggs
1/2 tsp butter
1/4 cup grated sharp cheddar cheese
1 tomato, diced
Large handful of cilantro, chopped
2 T sour cream
2 large flour tortillas

Remove the chorizo from the casing and crumble the sausage in a pan over medium heat.

Once the sausage is cooked through, remove it from the pan and set aside. At this point there should still be a good amount of fat in the pan (if there's more than a couple of tablespoons drain off the excess).

Saute the onions, peppers, and potato in the remaining fat; season with a pinch of salt and pepper and the 1/2 tsp of cumin.

Cook until the potatoes are tender (about 7-10 minutes). When the veggie mixture is softened, in a separate pan, melt the butter and scramble the eggs. Now that all of your components are ready you can start layering on your tortilla - eggs, chorizo, veggies, cheese, cilantro, tomatoes, and sour cream.

The best thing about this kind of meal is the flexibility and creativity it allows. I stood in front of my fridge and starting pulling out random things. If I didn't have a fresh jalapeño I could have thrown in a canned chipotle pepper (and if I did that I could have added some of the adobo sauce to my sour cream). No eggs? Substitute beans or chicken or tofu. Want more veggies? Chop up an avocado or double the peppers or....well, you get the picture.

Happy Cooking!

Sunday, March 27, 2011

Mini Banana Bread


The weather in Nashville this weekend was miserable - cold and rainy. Since I had no desire to venture out into the cold I stayed in and baked. I decided to whip up some banana bread because of the ridiculous amount of overripe bananas in my kitchen. Not just regular old banana bread, but mini banana bread with a cinnamon-sugar topping. Have you noticed that mini versions of food taste better? Maybe it's just me, but I have a thing for diminutive portions. This recipe also makes one regular loaf in case you don't have the same love for the mini loaf.


Banana Bread
makes 8 mini loaves or one regular loaf
adapted from Orangette

For the bread:
1 1/2 cups all purpose flour
1 cup granulated sugar
1 tsp ground cinnamon
1 tsp baking soda
1 tsp kosher salt OR 1/2 tsp table salt
1/2 tsp ground nutmeg
1 cup ripe banana, mashed (approx. 3 medium bananas)
2 large eggs
1/2 cup vegetable oil
1/4 cup honey
1/4 cup water


For the topping:
1 T granulated sugar
1 tsp ground cinnamon
2 T dark brown sugar


Preheat oven to 350 degrees F. Coat an eight-piece mini loaf pan with non-stick spray. In a large bowl combine the flour, sugar, cinnamon, baking soda, salt, and nutmeg.


In a separate bowl, mix together the banana, eggs, oil, honey, and water. Tip - measure the honey after the oil using the same cup. The leftover oil will help the honey slide out more easily.


Pour the wet ingredients over the dry and stir until the mixture just comes together.


Distribute the batter evenly between the loaf pans filling each one about three-quarters full. Top each loaf with the cinnamon-sugar topping.


Bake for 30-40 minutes until a toothpick inserted into the center comes out clean (for a regular loaf bake for 1 hour). Cool the bread in the pan for 15 minutes (30 minutes for a full loaf) before transferring to a wire rack to cool completely. Wrap loaves in plastic wrap and enjoy within 2-3 days.

Tuesday, March 22, 2011

East Nashville Beer Festival


You do have your ticket to the East Nashville Beer Festival, right? No? Good news - it's not too late to purchase a ticket and have the opportunity for me to pour you a beer. That's right, I'm officially on the pouring team - yay!  Get all the event details here and, hopefully, I'll see you on April 9th. Cheers!

Monday, March 7, 2011

How to Cook - Dried Beans

It doesn't get much more basic than a pot of beans. Up until a few years ago I never bothered to cook dried beans. Man, did I miss out. Canned beans, while convenient, don't hold a candle to the flavor of dried. They're worth the small amount of extra effort, and, with a little planning, you can cook a batch and eat it throughout the week.
Don't forget to check out the selection at your local farmers' market and online purveyors, such as Rancho Gordo, for heirloom and specialty varieties not available at the supermarket.


I use the quick soak method because I'm perpetually running out of time. But if you have time you can just soak the beans for 8 hours (or overnight). Here's the lowdown:


Spread the beans in an even layer on a sheet pan and remove any damaged beans and debris (twigs, dirt, very small rocks, bread, apples, a duck!). Move the beans to a colander and rinse thoroughly. Transfer to a large pot and cover with about three times as much cold water. If using the quick soak method bring the water and beans to a boil, boil for 1 minute, remove the pot from the heat, and allow to sit, covered, for 1 hour.


After an hour (or 8 if you're not quick soaking), drain the beans and set aside - the beans will have doubled in size after their bath. In the same pot you used to soak the beans, saute a large diced onion in a little bit of bacon fat (you do have bacon fat, right?) or oil (for all the non-bacon fat folks) until translucent. Add the beans to the pot, cover with enough fresh, cold water to submerge the beans by about two inches, and bring to a boil. Once it reaches a boil, reduce the heat to low to maintain a gentle simmer. I generally stir the pot once every 20 minutes or so and start checking for doneness after an hour. The beans should be soft but not falling apart. Now is the time to add salt to taste. Serve immediately - alone or over rice.
Leftovers can be refrigerated for 4-5 days; cooked beans can be frozen for up to 3 months.


Keep in mind that these are general guidelines. Cooking time will vary depending on the age of your beans (older beans take longer), the type of bean you're cooking (lima beans cook faster than black), and the hardness of your water (use filtered or bottled if your water tastes funky). Feel free to play around with the aromatics - add carrots, garlic, shallots, and/or bell peppers. Play up the spices by adding cumin, oregano, rosemary, bay leaves, etc. And last but not least, a little bit of meat - particularly pork - goes a long way in the seasoning department. Fatback and ham hocks are my go-to meat seasonings and I typically just throw them in after I saute the aromatics.


Happy Cooking!

Monday, February 28, 2011

Orange Cake with Cream Cheese Glaze


I really wanted cake yesterday, but came up short on some of the usual ingredients - namely butter and eggs. Thank goodness for the internet. I found a recipe for a vegan orange cake and decided to give it a go. I'm not vegan (I love bacon and honey too much), but I can really get behind this cake. It tastes fantastic, it's surprisingly easy, and, given the price of eggs and butter, it's budget friendly. Tasty, easy, and cheap - this may be my new favorite dessert.

I realize that the cream cheese glaze negates the vegan-ness of this dish, but you could remedy that by thinning some marmalade with a little hot water and using it instead.

Orange Cake with Cream Cheese Glaze
serves 10
adapted from the kitchn

Cake
makes two 9-inch rounds
3 cups all purpose flour
1 1/2 cups granulated sugar
1/2 cup dark brown sugar
2 tsp baking soda
1 tsp kosher salt
1 orange, zested
2 cups orange juice
2/3 cup vegetable oil
2 T apple cider vinegar
1 tsp vanilla extract

Glaze
3 ounces cream cheese, softened
3 T powdered sugar
Juice from half an orange

Preheat oven to 350 degrees F. Grease the bottom and sides of two 9-inch round cake pans.

In a large mixing bowl whisk together the flour, sugars, baking soda, salt, and orange zest.


In another bowl mix the orange juice, oil, vinegar, and vanilla.

Pour the wet ingredients over the dry and mix just until you no longer see big dry patches of flour.

Divide the batter evenly between the cake pans and bake for 30 to 40 minutes.

Allow the cakes to cool in the pans for 20 minutes before running a knife around the edge and turning out onto a cooling rack.

While the cakes cool make the glaze by whisking the softened cream cheese just until it becomes fluffy. Add the sugar and orange juice and whisk until thoroughly combined. If you need to thin out the glaze add a little more orange juice.

Glaze the cake while still warm making sure to pour a little bit of the glaze between the layers.

Sunday, February 20, 2011

Apple Skillet Cake

I love cooking in cast iron. Even heat and the ability to go from stove top to oven make it a winner in my book, but for some reason I always forget that I can bake in my cast iron skillet. I remedied that this weekend by throwing together an easy apple cake.

What do you enjoy baking in your cast iron skillet?

Apple Skillet Cake
serves 6-8

4-5 large apples or 5-6 small apples (I used Fuji apples since that's what I had on hand)
2 sticks of unsalted butter (one stick should be at room temperature)
2 cups all purpose flour
2 tsp baking powder
1 tsp kosher salt
1/2 tsp ground cinnamon
1 cup of granulated sugar, divided
1/4 dark brown sugar
2 eggs
1 cup low fat buttermilk
1/2 cup plain or vanilla low fat yogurt
1 tsp vanilla extract
1 tsp fresh lemon zest

Preheat oven to 350 degrees F.

Peel, core, and slice the apples into half inch slices. In a 10-12 inch cast iron skillet melt one stick of butter (not the room temperature stick) over low heat. When the butter is melted add 1/2 cup of the granulated sugar.
Add the apple slices to the skillet and arrange them in a single layer.
While the apples cook, prepare the batter by combining the flour, baking powder, salt, and cinnamon in a large mixing bowl.
In a separate bowl, combine the room temperature butter, the brown sugar, and the remaining 1/2 cup of granulated sugar. Using a hand mixer and starting out on low, beat the butter and sugar together until the mixture is fluffy (this is called creaming, by the way).
Add the eggs, buttermilk, yogurt, vanilla, and lemon zest to the butter and sugar and beat on medium speed until thoroughly combined.
Pour the liquid ingredients over the dry ingredients and stir with a wooden spoon just until the mixture comes together. Be careful not to over mix! Pour the batter over the apples and spread it out carefully to create an even layer across the top of the skillet. Bake for 30-40 minutes or until the top is golden brown.
Remove from the oven and allow to cool in the skillet for 10 minutes before inverting onto a plate or cake stand. Slice and serve warm or at room temperature.

Tuesday, February 8, 2011

Bacon!

I won the lottery - the bacon lottery! My awesome brother and my sister-in-law sent me a box overflowing with Benton's Bacon. If you're not familiar with Benton's you should stop what you're doing (including reading this post) and check out their website.


Needless to say, I'm pretty excited about the bacon-y adventures ahead and I'm open to suggestions on dishes to make. I've already put the kibosh on the Bacon Explosion (sorry, J).


I'll keep you posted on the goodness to come.

Wednesday, February 2, 2011

Buttercream


For her 10th birthday, G asked for a three-tier chocolate cake with chocolate frosting and fresh strawberries. Not wanting to disappoint, I concocted an elaborate plan to make this confection completely from scratch. By the time Thursday rolled around, however, I was still cake-less. With the party looming I decided to scrap my original (and completely unrealistic) plan and call in the big guns - the grocery store bakery. The bakery lady seemed a bit confused as to why I would order an unfrosted cake, but I felt at peace as I walked out of the store with my prize - a 7 inch cake round, a 4 inch cake round, and a jumbo cupcake.
I like cake. But let's face it, cake is simply a medium for frosting delivery.  Now that I had a platform it was time to make the good stuff - buttercream. Real buttercream is a delicious juxtaposition of rich and creamy, light and fluffy.

Chocolate Buttercream
adapted from Ina Garten
Makes approximately 4 cups
Note - This recipe contains uncooked egg whites. You can replace them with 1/4 cup plus 2 T of pasteurized egg whites.

1/2 pound bittersweet chocolate, chopped
6 ounces semisweet chocolate, chopped
3 egg whites at room temperature
3/4 cup of granulated sugar
1/8 tsp cream of tarter
1/4 tsp kosher salt
3/4 pound unsalted butter at room temperature
1 1/2 tsp vanilla extract
1 tsp instant coffee powder dissolved in 1/2 tsp water

Place the chocolate in a heat proof bowl over a pan of simmering water. Stir until melted, remove from heat, and set aside to cool.

In the work bowl of an electric mixer combine the egg whites, cream of tarter, and salt.  Place the bowl over the pan of simmering water and heat the mixture for about 5 minutes.  Return the bowl to the mixer fitted with a whisk attachment and whisk on high for 5 minutes or until the meringue hold a stiff peak.  You can test for stiff peaks by turning the mixer off, removing the whisk attachment and dipping it in the meringue.  When you turn the whisk upright the meringue should be glossy and hold its shape.

Reduce the mixer speed to medium and add the butter a tablespoon at a time waiting until each piece disappears before adding the next.
After all the butter has been added, scrape down the bowl and add the melted chocolate, vanilla, and instant coffee. Beat on medium for two more minutes stopping halfway through to scape down the bowl.
If you have leftover frosting place it an an airtight container and freeze. When ready to use, thaw in the refrigerator overnight. Bring to room temperature then beat on medium speed until fluffy.  Chances are you won't have any leftover since you'll take the bowl to your bedroom and lock the door only to emerge an hour later with a clean bowl and bits of frosting in your hair. Not that I have any personal experience with that...
Wednesday, January 26, 2011

Earl Grey Tea Scones

Last weekend I did a trial run for some of the treats I’m planning to make for my daughter, G’s, birthday.  She’s turning 10 (yikes!) and celebrating by inviting a handful of her girlfriends to a spa-themed slumber party.  We decided on the dinner menu: homemade macaroni and cheese with spinach and bacon and, of course, chocolate cake.

Breakfast was another matter.  In past years I’ve made pancakes, but the girls are often reluctant to sit still long enough to eat them.  This year I decided to have more portable offerings, and scones fit the bill.  Before I go too much further, I should confess that I have a lot of tea - more than any sane person should have.  So, after taking a quick pantry inventory and noting the mountains of tea tins lining the shelves, it was abundantly clear that I should make scones flavored with - you guessed it, tea!

I’m happy to report that it was a delicious experiment.  I hope G and her girlfriends enjoy the next batch as much I as enjoyed this one.

Earl Grey Tea Scones
generously adapted from Martha Stewart

Makes 8-10 scones

1 T Earl Grey tea leaves (I used Earl Grey Lavender tea; I’m fancy like that)
2 cups all-purpose flour
4 tsp baking powder
½ tsp kosher salt OR ¼ tsp table salt
⅓ cup granulated sugar
1 T turbinado sugar for sprinkling (optional)
6 T cold unsalted butter, cut into small pieces
¾ cup heavy cream, plus a little extra for brushing
1 egg, beaten
1 tsp vanilla extract
2 tsp Earl Grey tea leaves, crushed fine in a mortar and pestle
1 tsp freshly grated lemon zest

In a small saucepan over medium-low heat, combine the heavy cream and the tablespoon of whole tea leaves.  Allow the mixture to warm until you see whisps of steam rise from the cream.  Remove from the heat, stir, and allow to steep for 5 minutes.  After 5 minutes, strain the cream to remove the tea leaves and place in the fridge to cool.  You can also do this step ahead of time.
 

Preheat the oven to 375 degrees F.

In a large mixing bowl combine the flour, baking powder, and salt.  Stir well to combine. Add the cold butter to the flour mixture and, using your fingertips, break up the pieces of butter until they’re thoroughly coated by the flour.  Stir in the granulated sugar, lemon zest, and crushed tea leaves.

In a separate bowl combine the egg, heavy cream, and vanilla extract.  Pour the liquid ingredients over the dry and stir just until the mixture comes together.  It’s important not to overmix the dough or it will become tough.  Tough dough = sad dough.

Turn out the dough onto a lightly floured work surface and sprinkle the top with more flour. Gently pat the dough into a round about ½ inch thick.


Using a biscuit cutter (or in my case a plastic cup since I don’t have a biscuit cutter), cut out rounds and move them to a parchment-lined baking sheet.

Brush the tops with a little bit of heavy cream and sprinkle with the turbinado sugar.  If you don’t have turbinado sugar you can just use good old granulated sugar.  I like turbinado because it’s extra-sparkly.

Bake for 15 - 20 minutes until the scones are golden-brown and delicious.  Move to a cooling rack.  Serve warm or at room temperature.  Store leftovers in an airtight container or zip-top bag.

P.S. They’re great with a steaming cup of tea. ;-)

Saturday, January 22, 2011

Life-Changing Granola


Making granola at home will change your life.  You'll be thinner, wealthier, and able to multiply six-digit numbers in your head.  Okay, maybe not the six-digit number part, but perhaps the thinner and wealthier part. ;-)  Homemade granola is easy to make and tastes about a million times better than store-bought.


The recipe below was inspired by Alton Brown's version which you can find here.  I like to nix the raisins and add dried cherries and chocolate chips.  Feel free to play around with the other ingredients.  It's excellent with walnuts instead of cashews and you can throw in just about any dried fruit.

What's your favorite granola?


Cherry Chocolate Granola
3 cups rolled oats (not quick cooking or instant oats)
1 cup cashews
1 cup slivered almonds
¾ cup shredded coconut
¼ cup dark brown sugar
⅓ cup vegetable oil
¼ cup maple syrup
¾ tsp salt
1 cup dried cherries
¼ - ½  cup dark chocolate chips (depending on how chocolate-y you like it)
Preheat oven to 250 degrees F.  Combine the first five ingredients in a large bowl.  In a smaller bowl combine the oil, syrup, and salt.  Pour the liquid over the dry ingredients and mix thoroughly.  Divide the mixture evenly between two half sheet pans lined with aluminum foil and bake for 1 hour stirring every 15 minutes.
Allow the granola to cool thoroughly before adding the dried cherries and chocolate chips.
Store in an airtight container.